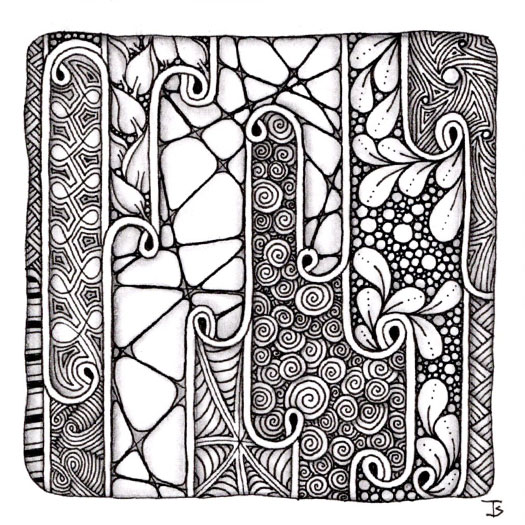
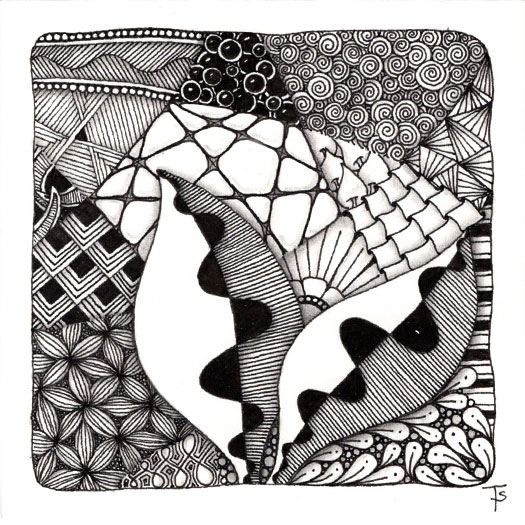
Melting Mooka, introduced to us by Zentangle's Project Pack #6 , is a wonderful version of Mooka that can be used to as a string to divide a tile into smaller spaces.
These internal sections, when filled with other tangles, result in a tile that gives the impression of stained glass windows.
This was a fun, playful exercise!
Zentangle drawn on Strathmore Vellum Bristol using a black, Micron pen. Shading done with graphite pencil.
Generally, now days, I use fewer tangles on a tile that I did when I began 10 years ago. But not always.
Yesterday, I decided to create a complex string and use a lot of different tangles. I had been looking through tiles from years ago and I wanted to see if I could still tangle in that style.
It took longer to choose the tangles than it did to draw them! 17 tangles is a LOT!
How do you challenge yourself? As an artist I’m always looking for different things to try as ways to grow and expand my skills.
Here, this tile was drawn entirely with my left hand. I even signed and dated the back with my left hand.
Why?
Well, first of all, I wanted to see if I could. In addition, drawing with your non-dominant hand builds new neural pathways in your brain. It also challenges you to look at things in a different way, and helps you to understand how your students, those that use a differnt hand to draw, are challenged to follow your instructions!
I accidentally left 3 tiles behind at the CZT Seminar. While I’m sad about that… I decided to recreate them! This one is done on a Zendala tile, but it’s not perfectly symmetrical. Working in the round isn’t something that I do very often. But I was very surprised at how relaxing this was. I think not having to make everything match from side to side takes the stress out of this type of design.
This is the second of a pair of tiles for my current project . I didn’t want both tiles to match exactly, but I wanted them both to have the same theme. The pictures of these have come out a bit paler than the actual tiles. Hopefully, the pictures of the end result will show the colors better!
Zentangle drawn on Strathmore Vellum Bristol using a brown Pigma Micron pen. Shading done with Copic marker and colored and graphite pencils. Color was done with Distress Ink markers.
Today’s Zenbutton is brought to you by the season: Spring!
Here, the weather can’t make up it’s mind. One day we’re handed Spring, another Summer and then we’re back in Winter. I have to check the weather report before I can get dressed!
So, I decided that I wanted to encourage Mother Nature and gift her with a Zenbutton that embodied flowers and leaves and the happy spring colors of warm pinks and yellow greens. It was fun looking through my tangles to select the ones that would work for this tile. I hope you enjoy looking at it as much as I did making it!
This is actually the second-to-last of the Project Pack 1 series, but I saved it to do last. Unlike the other projects in this series, this one is done on a tan tile. In the video Maria shows us her daughter’s beautiful photograph of pumpkin seeds that have arranged themselves into a spiral. It was the inspiration for this exercise, where we are using Pokeleaf, drawn in a spiral pattern.
This tile is from Project Pack 2, The Twelve Days of Zentangle. On day eleven, Rick and Maria used 3Z tiles assembled into stars! The video shows you how to make two different stars from both black and white 3Zs. I chose to make the white one this time.
This project was a lot of fun, and not all that difficult. The biggest problem I had was drawing over the gold ink with the micron pen. My pens hated it, and I had a lot of problems with it. Other than that, I liked working on the star shape, and enjoyed the process.
From the Zentangle Primer: Lesson 3, page 55, Exercise #9. We are instructed to let our tangles extend beyond the border.
In my tile, above, I decided to extend Braze all the way to the very edge of the tile. It looks as if it was dropped onto the drawing. I made the border very definite by turning it into a tangled frame all around the center of the tile. Florz made a nice, simple background that didn’t distract from the tangles sitting on top of it!
From the Zentangle Primer: Lesson 3, page 55, Exercise #8. For this string exercise we were to go “beyond the string,” and push past boundaries.
I think Amanda did a fantastic job, compared to her original string, which you can see below! I love the way her Pokeleaf meandered around part of the string and then went up and joined into the Verdigogh at the upper right!
Amanda’s talent and distinctive style is slowly emerging with each exercise that she does!
From the Zentangle Primer: Lesson 3, page 55, Exercise #8.
For this string exercise we were to go “beyond the string,” and push past boundaries.
I used the string as more of a comfort zone than as an actual string. I created the big Verdigogh “leaf” first, placing the central rib along a curved line that was part of my string. But I extended it past the outer bounding box. Next, I added the sprinkling of Printemps here and there, just at random, having nothing at all to do with the original string. The Poke Leaf sections were then added to approximately opposite corners and finally the Florz section was used to ad a bit of geometric precision to an other-wise free-flowing design.
This is a small, white, real pumpkin that I tangled on during October 2010.
It wasn’t easy to do because the squash was heavily coated in some kind of wax.
I used Pigma Micron pens, but they tended to stay wet a long time.
Also, the ink tended to bead up in spots so that when it dried, there were darker circles.
So, while this wasn’t a total loss, it was really frustrating to do.
New.
This Zentangle incorporates two new tangles that I haven’t done before: Pixioze and Kwazeela. The first one is on the far left, Pixioze, and was created by Margaret Bremner. You can find out all about it here . The second one, Kwazeela, is from Eni Oken. You can read about it here . In addition, Eni has created a Zentangle incorporating both of these that you can see here .
Zentangle drawn on Strathmore Vellum Bristol using a black, Micron pen. Shading done with graphite pencil.
Growth.
At the center of it all, there has been a seed planted. And now the growth begins. The living towers still stood, although the lace dress and pearls were sold long ago. But the new growth was hope, renewed.
Zentangle drawn on Strathmore Vellum Bristol using a black, Micron pen. Shading done with graphite pencil.
Tangles: Avreal Courant Florz Jay Six Muchin Pokeleaf Y-ful Power
Island vacation.
She looked down, out of the window of the raised hut to the cobblestone path and imagined the adventures that were possible here.
This Zentangle had a life of it’s own and ended up nothing like it’s original conception! Once of the tangles that came out of the jar was Tuffit. I never know what to do with it, since it kind of looks like a cross between an alien space ship and sofa pillow. I decided to just play with it, rounding out the edges and drawing it in a different order. Then something possessed me to fill in the centers with perfs. Apparently they wanted to be some kind of exotic blooms!
Template.
If you look closely at the string I used for this tile, you‘ll see two vases. I traced around a vase-shaped template, reversing and overlapping it for the second shape.
Zentangle drawn on Official Zentangle tile using a black, Micron pen.
Tangles: Afterglow Flutter Juke Kandy Snakes Knase Knightsbridge Opus Pokeleaf Quipple Sproing Stiritup Umble
Leftie-Louie.
This tile was done entirely with my non-dominant hand. That includes the shading and even the date and signature on the back. I was actually surprised at how well it turned out!
Zentangle drawn on Official Zentangle tile using a black, Micron pen.
Tangles: Crescent Moon Echoism Fescu Florz Nzeppel Pokeleaf Tipple
Ca-Ray-Zee!
Ok, this is old, and I don‘t remember what I was trying here, other than to try tangling on a colored background with a different colored pen. This tile has no shading, and frankly, I don‘t think adding it would help at all. It looks like the string had lots of curves, but who knows how it all began!
Zentangle drawn on colored card stock using a sepia Micron pen.


