We had a small, fun class yesterday!
Zentangle drawn on Strathmore Vellum Bristol using a black, Micron pen. Shading done with graphite pencil.
Tangles: Bales Crescent Moon Florz Hollibaugh Printemps

No matter which tangle you choose, there are usually many different ways to draw it.
Take Hollibaugh, for example. I’ve used curved, filled, flared, “holyhollibaugh”, coffered, wrapped, auraed, woven, swerved and mummy versions, to name a few.
So I thought it might be good to have a way to keep track of these versions all in one place. That way, I would have a reference of styles to choose from.

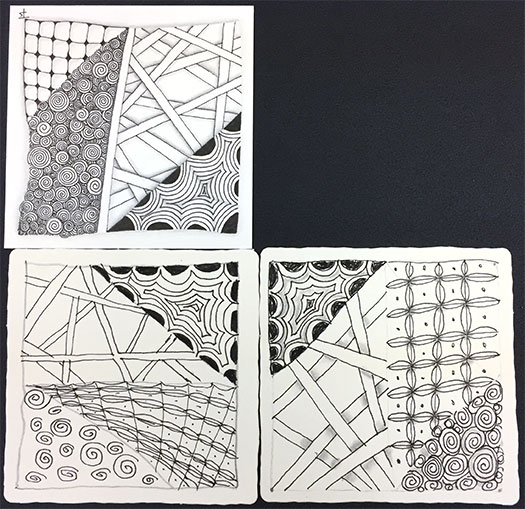
Another Introduction to Zentangle class at Good Gifts Healing Arts!
I am so blessed to be able to share with others!

Yesterday I taught a classes at Good Gifts Healing Arts Studio . Above is the mosaic from the Introduction to Zentangle class , including my tile (the one with Florz).
I love sharing Zentangle with others!
Zentangle drawn on Strathmore Vellum Bristol using a black, Micron pen. Shading done with graphite pencil.
Tangles: Bales Crescent Moon Florz Hollibaugh Printemps
Overhead.
We spend so much time looking down. I wonder how much we miss by not looking up once in a while? What is the ceiling like in the Cathedral or Museum? How about that old building on the corner? What does it look like above the trees at night? Or the clouds in the sky before or after a storm?
Zentangle drawn on Strathmore Vellum Bristol using a black, Pigma Micron pen and a cool grey Copic Multiliner. Shading done with graphite pencil.

Monday, July 16, 2018 I taught the first and second Introduction to Zentangle classes at Good Gifts Healing Art Studio .
We had eight eager students in the first session. You can see their tiles above, before we did any shading on them.
The second session was smaller and more personalized, with two wonderful, attentive students. Below, I’ve added my tile to the mosaic to make it more impactful.
I had so much fun with everyone! It was really interesting to listen to each student’s story and find out what brought them to Zentangle and what they plan to do with.

We all came to this particular path from different directions: locations, desires, experiences, expectations, dreams…
Now, we will travel together for a while. Each doing the same thing, but each doing it their own way.
This is our first step on this journey.
My first tile from the CZT30 seminar!
Zentangle drawn on an Official Zentangle tile using a black, Micron pen. Shading done with graphite pencil.
Tangles: Crescent Moon Florz Hollibaugh Printemps

If you are in the Phoenix metro area, you can take a beginner’s Zentangle class from me!
Introduction to Zentangle Class with Tandika Star, CZT (Certified Zentangle Teacher) Zentangle is a simple-to-learn, relaxing, meditative way to create beautiful art by drawing structured patterns, one stroke at a time. Unlike other art forms, there is no preplanning, experience or mistakes in Zentangle.
In the introduction to Zentangle Class, you will learn the philosophy, method and approach to creating Zentangle art. You’ll walk away with a completed tile, an understanding of the Zentangle Method, the knowledge of how to create several tangles, shading techniques, all needed basic supplies and a resource list that will have you up and tangling and wanting to know more.

Do a little.
I’m still have a little trouble getting back into the swing of my daily routine. So I did this first thing yesterday morning, just so that I would accomplish something. I find that I can always fall back on the basic tile, that we all make in our first Zentangle class for a comfortable, meditative experience. In this case, I changed it up a little by using a black, 3Z tile. Not everything we create has to be a master work of art!

This is the second of a pair of tiles for my current project . I didn’t want both tiles to match exactly, but I wanted them both to have the same theme. The pictures of these have come out a bit paler than the actual tiles. Hopefully, the pictures of the end result will show the colors better!
Zentangle drawn on Strathmore Vellum Bristol using a brown Pigma Micron pen. Shading done with Copic marker and colored and graphite pencils. Color was done with Distress Ink markers.

Another piece in my current project! I had so much fun making this part. I hope the rest of it goes like this!
Zentangle drawn on Strathmore Vellum Bristol using a brown Pigma Micron pen. Shading done with Copic marker, colored and graphite pencils. Color was done with Distress Ink markers.
Tangles: Hollibaugh Kuke Web

This tile uses a basic technique referred to as a Zenbutton. CZT Marguerite Samama is credited as the inventor of this technique. She was experimenting with methods for using Fragments in different ways when she discovered it.
You can watch an instructional video, created by Melinda Barlow, CZT, here , to see the basic technique.
I’ve been thinking about trying it for a few days. Yesterday, I sat down and went for it. For my first attempt, I’m very happy with the results. I will definitely add this to my tangle enhancing techniques!

Tradition.
We all enjoy learning new things, pushing boundaries and growing in our art. But we shouldn’t forget where we came from in the process.
To keep with the original tradition of Zentangle, I have used the die and legend that came with my new Zentangle Kit to select the tangles that I used for this tile. I chose them one at a time, filling in a section before rolling for the next. I went around clockwise, starting with Bales. I think it’s fascinating how everything fits together and looks good without having to think much or labor over what to use where. That is what makes this type of tangling a very meditative experience.

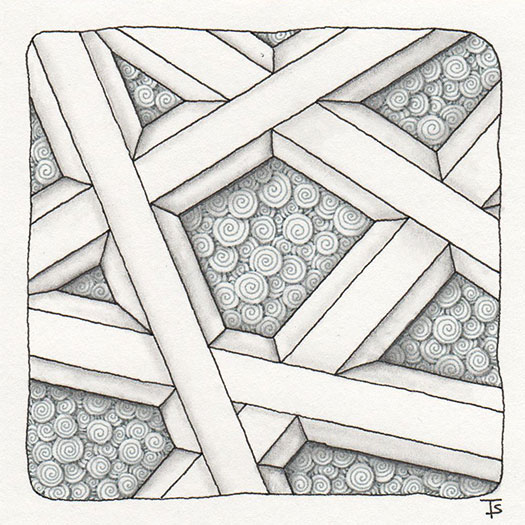
WhollyHollibaugh.
Recently, Zentangle released a new video, #18, in the Kitchen Table series that illustrated the principle of seeing behind parts of a design through a window, or cutout in a tangle. Hollibaugh was used to illustrate this, so I decided to create this tile for my collection showing the concept. They call the tangle enhancement “Wholly Hollibaugh.”
Zentangle drawn on Stonehenge Kraft using black and brown Pigma Micron pens and Sakura white gel pen. Shading done with Copic marker and graphite and colored pencil.

If you will recall, I was experimenting with using Membranart as a background behind other tangles, here . I made a fairly complex version of it to provide some tension with the foreground.
Amanda liked the idea of that, so she decided to experiment, also. She chose a simple tangle, Hollibaugh for the foreground so that she could concentrate on the Membranart itself. This was a new tangle for her to tackle, and I think she did a great job here!

Palette.
Her basket was full of magical designs just waiting to be added to a frock or a cushion. Some plain, some fancy, some simple, some complex, woven together they created a magical mixture for the customers to choose from.
The basic string for this Zentangle came from the Tangler's Palette" stencils from Acadia Laser Creations on Etsy. I wanted this set of stencils as soon as I saw them. They offer so many different possibilites for creative play!

If you saw my New Year's post , then you know that I have challenged myself to work on black tiles more frequently this year. I want to develop techniques and find the materials that work for me. For that reason, for every challenge or lesson from Eni or any other artist, I am making a black tile for the theme as well as a normal one.
To that end, this is my black tile from Eni’s Zentangle Basics lesson. for this one, instead of charcoal, I tried using a white, colored pencil to do the highlighting. I found that it would actually move and blend, somewhat, with a clean stump. I do wish it was a brighter white where it was applied the heaviest, though. I will need to keep experimenting!

The newest Art Club video from Eni Oken's Art Club is a lesson on Zentangle Basics . Almost everyone, when they take their first Zentangle lesson from a CZT, creates a basic tile, using certain tangles that illustrate what Zentangle is all about. Eni’s video is no different, (after all, she IS a Certified Zentangle Teacher!) This is the tile I created while watching the video.
I’ve been tangling now for many years. My first actual tiles are dated 2010, but I was tangling before that in my sketchbook. If you go to the Zentangle Gallery page, by clicking on the link here or at the top, right of this page, I bet you will recognize more tiles that are based on the beginner’s instructions. This is the sixth tile to be added to the collection. Can you find them all?

This tile is a direct result of following the instructions on the blog post for the First Day of the 12 Days of Zentangle over at zentangle.com .
The purpose of this exercise was to draw each of the tangles that are used to teach a brand new person how to tangle. The most common tangles used for a beginner’s tile are Crescent Moon and Hollibaugh and they are often followed by Florz (or Bales) and Printemps. However, we are instructed to draw each of the tangles with a “twist.” For example, Cresent Moon is drawn using triangles and angled auras, and Hollibaugh is drawn so that the strips look more like roots and are intertwined with each other.

From the Zentangle Primer: Lesson 3, page 55, Exercise #8. For this string exercise we were to go “beyond the string,” and push past boundaries.
I think Amanda did a fantastic job, compared to her original string, which you can see below! I love the way her Pokeleaf meandered around part of the string and then went up and joined into the Verdigogh at the upper right!
Amanda’s talent and distinctive style is slowly emerging with each exercise that she does!