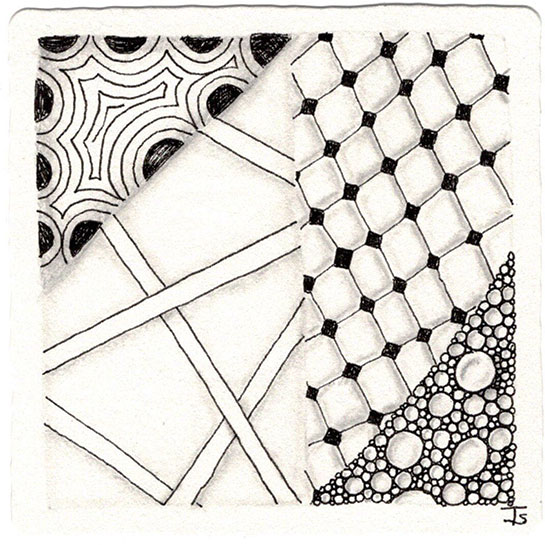
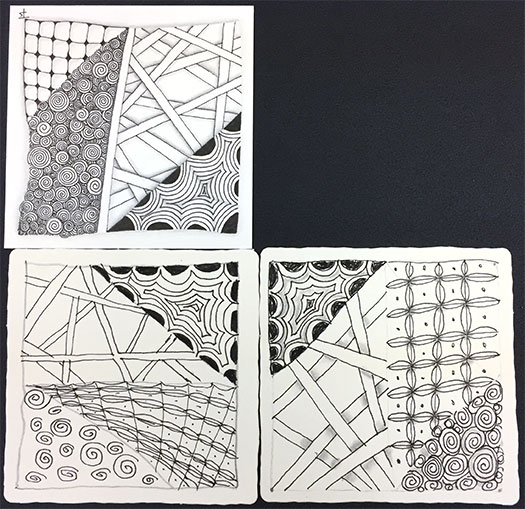
Another tile from a Beginner’s Class this week. I may have enough of these to create my own Mosaic!
I never get tired of drawing these. Each time, while they always have the same plan, they come out somewhat different. It depends on the day, the artist, and what they feel like doing.
It’s one of the wonderful things about the Zentangle Method!
Zentangle drawn on an Official Zentangle Tile using a black, Micron pen. Shading done with graphite pencil.
I had an introductory class with a private student yesterday. We had a wonderful time together. This is the tile I created while teaching.
Every so often, I think it is very important to go back to the very beginning and do that “first tile” again. Every single person who has taken a class from a CZT creates this tile, or one very similar with the classic “Z” string. Sometimes the tangles used vary slightly. But there is so much to learn and remember from that Beginner’s class!
I have taken a lot of time off from traditional tangling. Basically, since the beginning of 2019. Sometimes, you need to take a break to evaluate where you have been… and where you are going. Sometimes, roads take off in unexpected direction. Sometimes we set off the road entirely to explore new territory.
And then the roads, the paths, the discoveries come around to a new understanding of where you were before.
Army of Squirrels.
This started out being a tile that was all about Crescent Moon for a FB challenge. But, when I was looking around my studio for ideas of what to do with CM, I found Aloha drawn on something. My squirrels decided that I should add that to the tile.
After that, I figured all was lost… with the squirrels being in charge and just went with the flow.
Yesterday I taught a classes at Good Gifts Healing Arts Studio . Above is the mosaic from the Introduction to Zentangle class , including my tile (the one with Florz).
I love sharing Zentangle with others!
Zentangle drawn on Strathmore Vellum Bristol using a black, Micron pen. Shading done with graphite pencil.
Tangles: Bales Crescent Moon Florz Hollibaugh Printemps
Northwest.
Various parts of the country have a history of native, tribal art which influences the decorative choices of that particular area. Recently, my husband traveled to Portland, Oregon for a business conference. While there, he found a book, "Looking at Indian Art of the Northwest Coast" by Hilary Stewart.
I like the graphic effect produced by using black, white and red. So I decided to give it a try on a Zentangle. I don’t know how effective it is here, but it was an interesting exercise.
Amanda created this tile with the help of her family! She has four children that range in age from 7 to 17 years old.
She started by creating the string and then, each child would roll a dice and select a random tangle. The child would also choose where the tangle would go in the string.
The kids got a big kick out of challenging Mom, and they had a ton of fun. In addition, the final Zentangle came out great!
Monday, July 16, 2018 I taught the first and second Introduction to Zentangle classes at Good Gifts Healing Art Studio .
We had eight eager students in the first session. You can see their tiles above, before we did any shading on them.
The second session was smaller and more personalized, with two wonderful, attentive students. Below, I’ve added my tile to the mosaic to make it more impactful.
I had so much fun with everyone! It was really interesting to listen to each student’s story and find out what brought them to Zentangle and what they plan to do with.
This beautiful Spundala was created by CZT Amanda Higbee! I am blown away that she used Pea-nuckle in the round. I don’t think that I’ve ever seen anyone do that before! It certainly never occurred to me to try it!
Zentangle drawn on Strathmore Vellum Bristol using a purple and pink, Sakura Pigma Micron pens. Shading done with watercolor pencils.
Tangles: Crescent Moon Emingle Keeko Pea-Nuckle
We all came to this particular path from different directions: locations, desires, experiences, expectations, dreams…
Now, we will travel together for a while. Each doing the same thing, but each doing it their own way.
This is our first step on this journey.
My first tile from the CZT30 seminar!
Zentangle drawn on an Official Zentangle tile using a black, Micron pen. Shading done with graphite pencil.
Tangles: Crescent Moon Florz Hollibaugh Printemps
If you are in the Phoenix metro area, you can take a beginner’s Zentangle class from me!
Introduction to Zentangle Class with Tandika Star, CZT (Certified Zentangle Teacher) Zentangle is a simple-to-learn, relaxing, meditative way to create beautiful art by drawing structured patterns, one stroke at a time. Unlike other art forms, there is no preplanning, experience or mistakes in Zentangle.
In the introduction to Zentangle Class, you will learn the philosophy, method and approach to creating Zentangle art. You’ll walk away with a completed tile, an understanding of the Zentangle Method, the knowledge of how to create several tangles, shading techniques, all needed basic supplies and a resource list that will have you up and tangling and wanting to know more.
Do a little.
I’m still have a little trouble getting back into the swing of my daily routine. So I did this first thing yesterday morning, just so that I would accomplish something. I find that I can always fall back on the basic tile, that we all make in our first Zentangle class for a comfortable, meditative experience. In this case, I changed it up a little by using a black, 3Z tile. Not everything we create has to be a master work of art!
Planetary jewels.
Each planet she visited had special gemstones. Either forged in fire, such as the agate pendant or grown in the sea, like the beautiful pearls… They were collected and traded for other goods in the market. You see, even the finest, most valuable jewels cannot be eaten when you are hungry.
Zentangle drawn on Strathmore Vellum Bristol using a black, Micron pen. Shading done with graphite pencil.
Tradition.
We all enjoy learning new things, pushing boundaries and growing in our art. But we shouldn’t forget where we came from in the process.
To keep with the original tradition of Zentangle, I have used the die and legend that came with my new Zentangle Kit to select the tangles that I used for this tile. I chose them one at a time, filling in a section before rolling for the next. I went around clockwise, starting with Bales. I think it’s fascinating how everything fits together and looks good without having to think much or labor over what to use where. That is what makes this type of tangling a very meditative experience.
Palette.
Her basket was full of magical designs just waiting to be added to a frock or a cushion. Some plain, some fancy, some simple, some complex, woven together they created a magical mixture for the customers to choose from.
The basic string for this Zentangle came from the Tangler's Palette" stencils from Acadia Laser Creations on Etsy. I wanted this set of stencils as soon as I saw them. They offer so many different possibilites for creative play!
For my final Crazy Huggins sampler, I cut a large, apprentice-sized tile from a new paper I got recently. I filled the tile with Crazy Huggins shapes, then filled each element with another tangle. Somewhere along the line, the design developed a mind of its own, and decided not to be symmetrical anymore. But, honestly, I think that just made it “interesting!”
This tile took quite a while to complete. I knew it might take a bit longer, but it turned out to be a lot longer! And, when I finished filling in all the shapes, I wasn’t sure I liked it. But, in true, Zentangle fashion, I continued on and shaded the design. However, it wasn’t until I added the highlights that I decided everything was fine.


