Today is the International Day of Zentangle for 2025.
To celebrate, there was a live lesson on YouTube this morning. You can watch a replay of the live stream here .
In the video, you will learn a lot about the tangle Huggins, which was chosen as the tangle of the year for 2025! It is one of my favorite tangles, and Maria’s explanation of why she chose it just makes it that much more appropriate for this particular lesson.

Project Pack 07 - Day 11
In today’s video, located here , Rick shows us how to use the tangle Paradox to create a fun set of puzzle tiles.
I actually started this project a couple of days ago, but didn’t get it finished until this evening! These small tiles have a lot of line work, and I had a lot of interruptions. With all that, I think the effort was well worth it! Playing with them to create different Meta Patterns is fun and gives you even more ideas of way to play with this tangle!
Project Pack 07 - Day 7
Today’s video, located here , Molly uses a variation of Fife as a fragment and fills both the positive and negative spaces with reticula U2 and K1, respectively.
I accidentally skipped over this lesson by accident a couple of days ago. I suspected that I had missed a lesson because my numbering system didn’t line up correctly. I’m glad I went back and checked!
This tile was a bit time consuming because the design has a fair amount of line work. Also, the shading, coloring and highlights took some time. But I think the overall effect made spending the time well worth it.
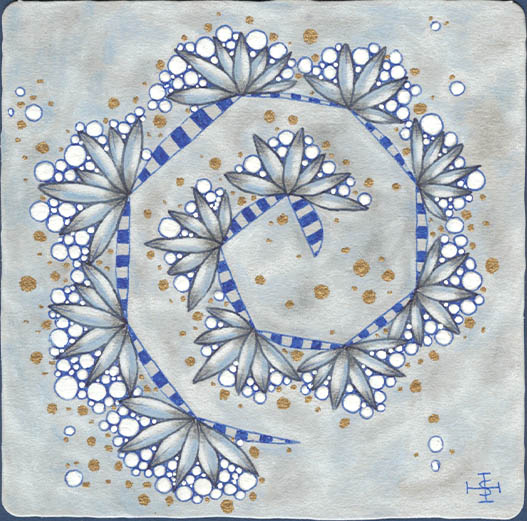
Project Pack 07 - Day 9
In today’s video, located here , Martha shows us how to use a spiral as a starting point for a beautiful composition.
One of the most interesting and, for me, new, things in this video was the unique background treatment. It wasn’t hard to do, and it added an additional textural element to the composition. I will add this concept to my repertoire for future use!

Project Pack 07 - Day 8
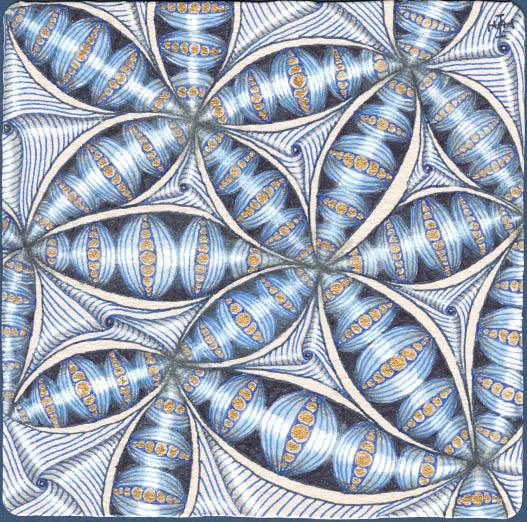
Today’s video, located here , shows Maria using a single instange of Cadent being used as a fragment.
This was an interesting project. It started with a large, single Cadent shape on a standard tile. Then inner and outer auras were drawn following the main lines of the fragment.
With that completed, different reticula are added to each section to give the whole design the look of folded, billowing fabric.
Project Pack 07 - Day 6 - Hollis, Moon Pie
Today’s video, located here , shows Rick drawing Hollis on a Zendala tile.
This is only the second time I’ve drawn Hollis. This first time was about a month ago, and I didn’t really have the hang of it yet. You can see the previous attempt here . I really appreciate the video and being able to watch someone else draw it!
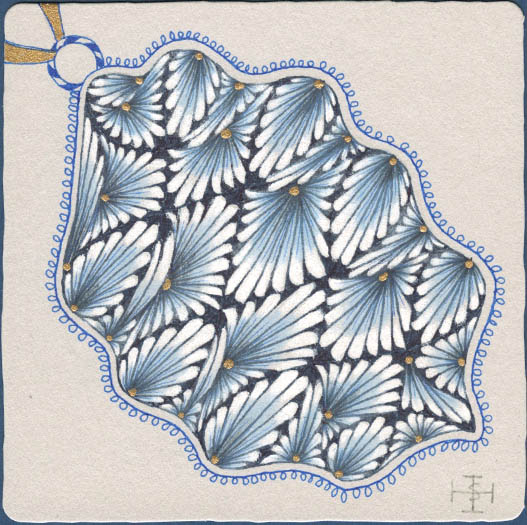
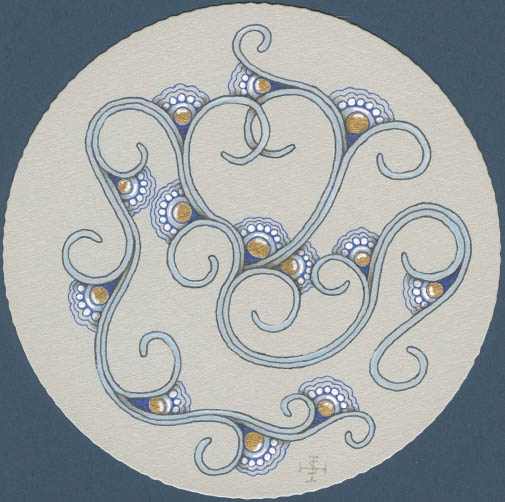
Project Pack 7 - Day 5
A beautiful ornament.
This day’s tile began with a very unusual string construction. You can watch the video here to see how to create it for yourself.
After creating the string, a fragment Zentangle refers to as Peppering is drawn inside of each space.
I think what really makes this tile come to life is the white highlights, blue pastel pencil and the dark graphite. Prior to that, it was a bit dull.
Another day…we wake up to no internet…still.
Again, my daily tile is done with randomly selected tangles. The string, also picked randomly is one that radiates from a central point.
I got to practice a few tangles that I haven’t drawn a lot. Others I am quite familiar with.
I think the overall effect is a bit busy, even though I tried to place the various tangles to give the eye a rest at various points.
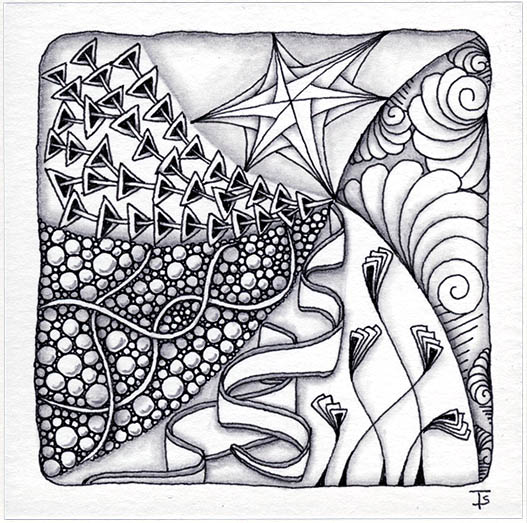
The internet went out this morning. It will not come back today. As a result, I wasn’t able to view anything on line. So today’s tile is a break from the Project Pack 07.
This tile was created from a random tangle selection. I actually pulled five tangles, but only used three of them: Rumpus, Squid and Trellina. I wasn’t sure how this idea would turn out, but I an happy with the finished tile!
Project Pack 07 - Day 4
This video for this day’s project is located here .
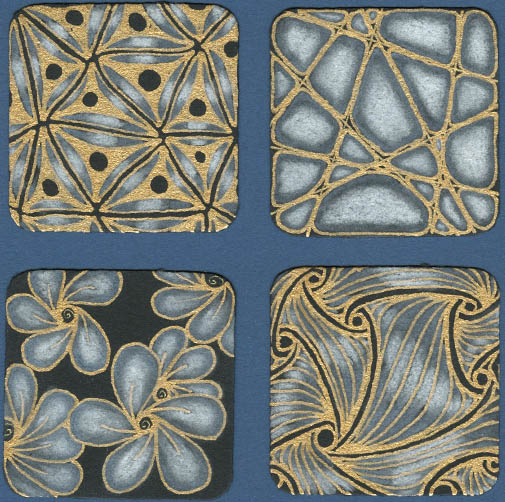
Today’s project was to use black Bijou tiles with the blue pastel pencil to show how a blue-grey color can be used to advantage on a black tile.
All the tangling was done with a gold, Gelly Roll pen. The flow from this pen is lush, and you have to get used to what speed to use to achieve the line quality you want. If you hesitate or pause, the ink keeps right on flowing!

Project Pack 7 - Day 3
A beautiful star.
The video for this tile is here .
I am becoming more comfortable with Zendala tiles! I didn’t have many qualms about tackling this day’s drawing… other than it fell on a day of the week when I have the least amount of free time. But that’s ok. I just finished it the next morning.
I am also getting more comfortable working on grey tiles. Right now, here, it is well over 100 degrees every day. The grey and blue combination is very cool and refreshing in comparison!
Project Pack 7 - Day 2
All Stars is a tangle created by CZT Tomàs Padrós. I had never drawn this tangle before today. It requires some concentration, but I think the finished design is lovely, even with my wobbles.
As I was creating this tile, and had finished the line work, I wasn’t too thrilled with it. But once the shading and highlights were added, it was amazing how different it looked… like it had come to life with depth and dimension!
Project Pack 7 - Day 1
I had a bunch of gray tiles in my stash, but I’ve never really done much with them. So I decided to order Project Pack 7 from Zentangle . This PP was introduced for the 2019 Christmas season and is one of the 12 Days of Zentangle series. The theme for this pack is “that like in life, Zentangle, too, is not just black and white … there are many shades of gray in between.”
Circus.
As I was selecting tangles randomly, they began to evoke the feeling of a time when the circus would come to town. We would always go, sometimes as a family, sometimes as a class from school. Sitting under the big top, watching the people flying across on trapeze or getting a bag of popcorn to munch on while watching elephants parade with riders or stand on their hind legs was always fascinating for kids!

There are tangles that we love and draw over and over again. There are tangles that we don’t draw often because they are kind of like a pair of new shoes…kind of unfamiliar and uncomfortable. For me, this tile contains both.
My husband says that this tile reminds him of Christmas. I can see what he means: pine branches, berries and decorative leaves, oh my!
Zentangle drawn on Strathmore Vellum Bristol using a black, Micron pen. Shading done with graphite pencil.
Random tangles. Random string.
This tile has many tangles that I enjoy drawing. Repetitive line work is very relaxing. Squirmy is a favorite because it can fill any space. And Crazy “Nzepple is just fun.
Zentangle drawn on Strathmore Vellum Bristol using a black, Micron pen. Shading done with graphite pencil.
#drawing #tile #zentangle
Tangles: Crazy 'Nzeppel Drupe Lightning Bolt Papyrus Pendrils Squirmy

A gaggle of gourds!
Sometimes, a monotangle is just what you need. I drew this version of Gourdgous on a small bijou tile recently and ever since then, I really wanted to try this on a regular tile.
I drew a random string with lots of sections, then I squished a gourd into each one. It almost looked like the tangle Bunzo, but with seeds until it was shaded and the highlights were added.
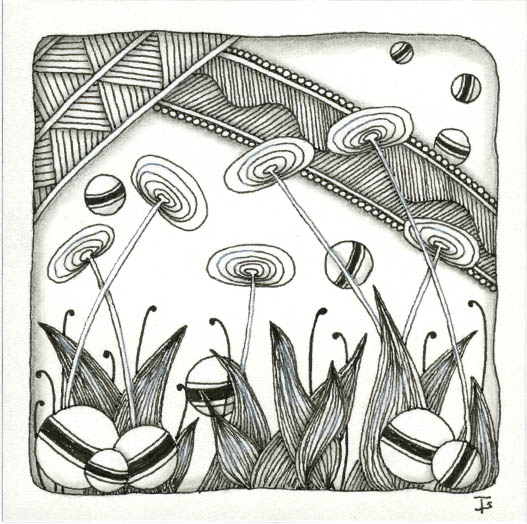
When I draw tangles chosen at random, I sometimes get combinations that pose challenges. At first glance, it seemed like these wouldn’t combine well. But the tangle Sedgling suggested a garden theme… which is what I went with.
Here is a question: Are the Jetties falling like rain? Or floating up and away like seeds or pollen?
Zentangle drawn on Strathmore Vellum Bristol using a black, Micron pen. Shading done with graphite pencil.
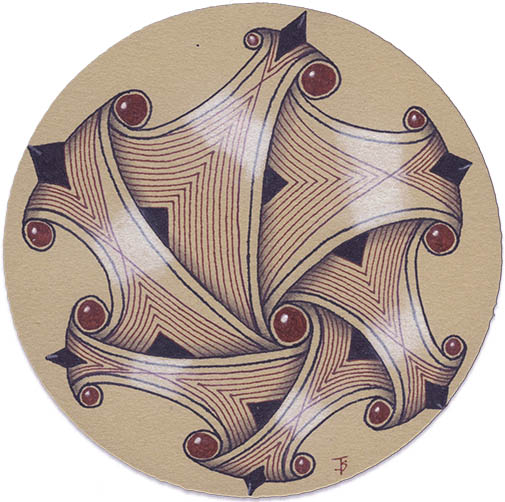
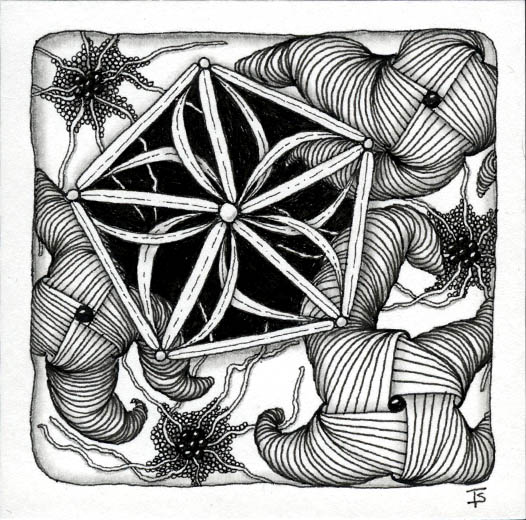
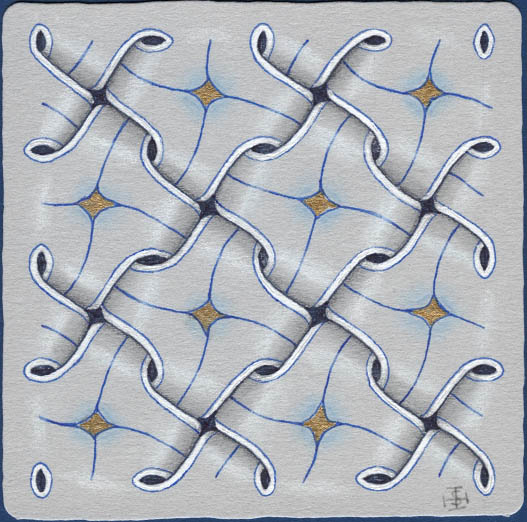
There was recently a challenge in the Zentangle Mosaic app to draw Huggins very large on a journal page. Then use the shapes as the string and fill in the sections with tangles.
I don’t tangle in a journal, per se, so instead, I just did it very large on a tile and filled in the sections with Crazy ‘Nzepple and Dansk. Looking back, I found that I often use the first, but this is the first time I’ve used the latter with Huggins.
Do you ever get an idea for a tile but it doesn’t end up like you thought it would?
This is an example of that!
This started with the tangle Aiposaat. I was going to draw it as a spiral, but it didn’t happen. Then I thought I would add a triangular pattern next to the zig-azg edge. That was a bit strange because of the variation in the zig zags. So I decided to treat it as a curved element and add more patterns on the curve. Then I filled in the two corners with patterns I could think of that fit.