
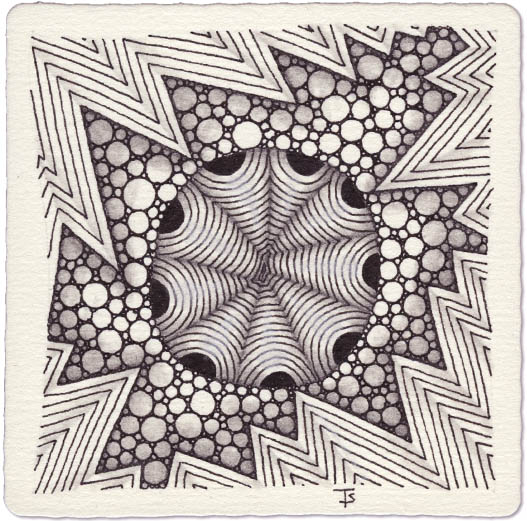
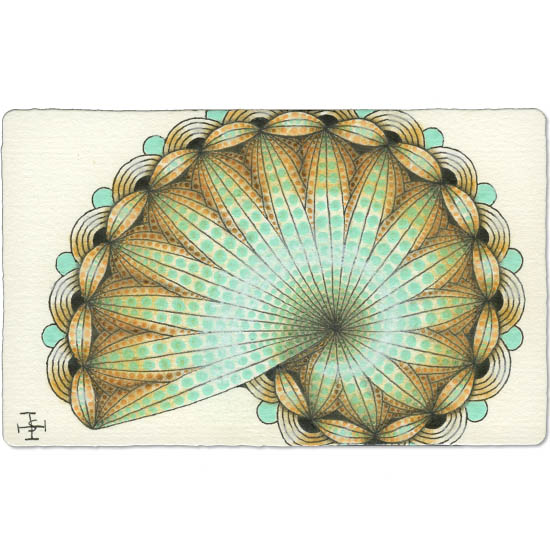
“One Zentangle A Day” by Beckah Krahula - Day 6
The new tangles introduced for this day are Amaze, Flux and Mooka.
I used Amaze at the top of the tile to fill the space above the focal point design. The random lines create texture and darkness without overwhelming the rest of the tile.
The traditional Mooka shapes work well as a fan-like foundation from which the Flux can emerge.
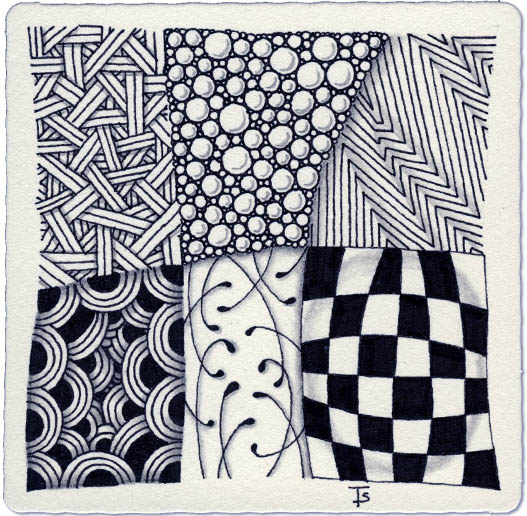
“One Zentangle A Day” by Beckah Krahula - Day 5
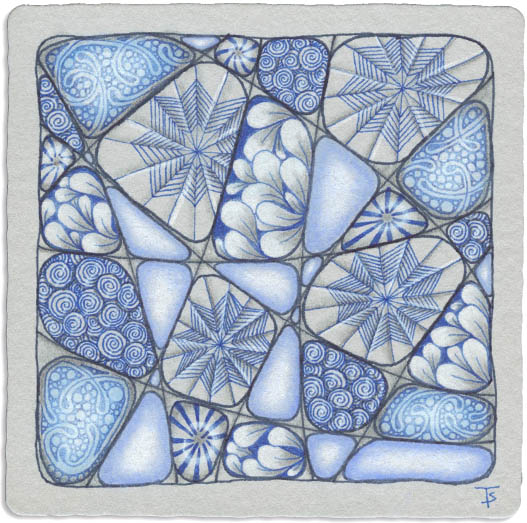
The two new tangles for this day are Isochor and Printemps. Beckah chose them because they are perfect candidates for adding “sparkle”, a tangle enhancer. If you look at my tile above, you will see little white spots on two of the tangles where the lines are incomplete. They create the impression of a small highlight.
Another small change in the practice for this day is the use of an Artist’s Trading Card for the tile. At one time, Zentangle sold these, precut from the same paper as the standard white tiles. I’m sad that they are no longer available. I used one from my dwindling last pack for this exercise.

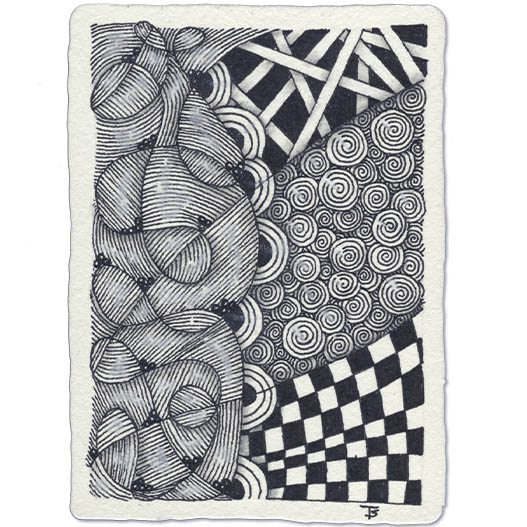
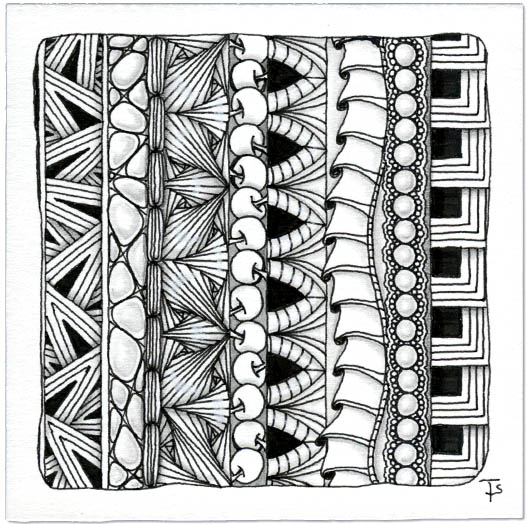
“One Zentangle A Day” by Beckah Krahula, Day 4.
For this day, the new tangles are Jonqual, Nipa and Shattuck. The focus is on angular vs circular patterns. As an interesting shading exercise, the circles in Nipa could be shaded as an orb…or a hole!
I kept the string very simple, drawing a square at and angle in the center of the tile.
I drew the lines within Shattuck and Tipple so that they weren’t perfectly straight or even to add more interest. Because both Shattuck and Nippa are mostly lots of lines, I placed them so that the directions were a contrast to each other.

“One Zentangle A Day” by Beckah Krahula, Day 3.
The focus of this chapter is creating depth by overlapping designs.
Above, you can see how the Poke Root stems and fruit weave in front of or behind the ribbons of the Hollibaugh tangle. At the top, the third tangle, Festune is drawn “behind” these ribbons. In Zentangle, the term “drawing behind” is used to describe this technique.
Although this tile is simple, you have to really think about what you are doing. Sections have to be drawn in the proper order to achieve the layering effect.
This is the tile that I’ve created for Day Two from the book “One Zentangle A Day” by Beckah Krahula.
I had a choice of using the three new tangles, Fescu, Knightsbridge and Nekton and whatever tangles from the first day that I wished. Since my string had six spaces, I chose to use all of the tangles from both days.
I didn’t necessarily use the same style for the tangles, choosing, for example, to do a different tanglation of Crescent Moon.
I was looking through my library of Zentangle books, and I came across Beckah Krahula’s “One Zentangle A Day”. I haven’t looked at this book in a very long time, so I pulled it out and began reading. I like her writing style and appreciate how well she covers various topics.
The tile above is the “Day 1 Exercise”. This chapter is all about getting acquainted with your tools. She introduces three beginner tangles: Crescent Moon, Static and Tipple.
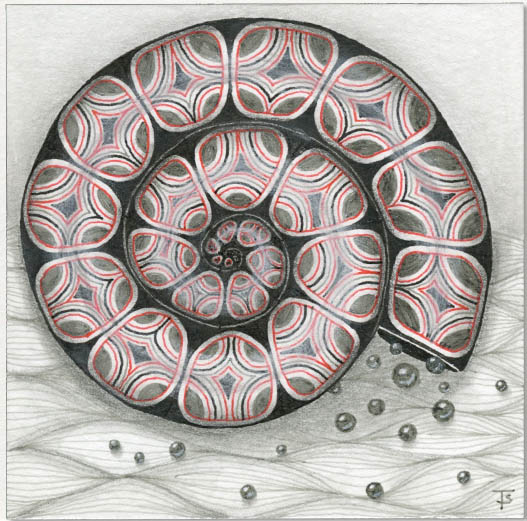
Today’s ‘Nzepple is nestled into the shapes of a spoken-style Crazy Huggins!
This was lots of fun to draw and went quickly. Coloring and highlightng each bubble took a bit of time, but the results were worth the effort.
The graphite shading was done after the ‘Nzepple bubbles were completed and was easy to do.
I love the way this came out!
Zentangle drawn on a tan Zentangle tile using black and brown Micron pens. Shading done with pastel pencil and graphite pencil. Highlights created with white chalk pencil.

Random string with random tangles.
While I enjoyed drawing this tile, I think the overall compositione is chaos vs. organization. If it wasn’t for the lower left corner, the other tangles would kind of be floating in space!
But tangling always serves a purpose, even if it’s just practice and meditation.
Zentangle drawn on Strathmore Vellum Bristol using a black, Micron pen. Shading done with graphite pencil. Highlights created with white chalk pencil.
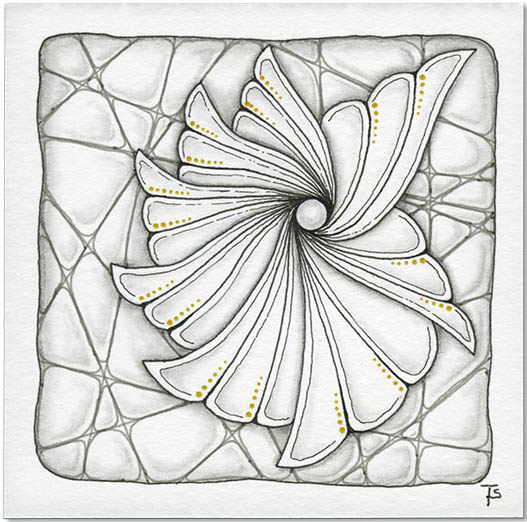
Project Pack 22 - Day 4 - Radiant Spiral
This pre-strung Phi tile had a design with radiating lines, rather than lines following the spiral design. This allows for creating a spiral with a completely different aspect than the previous ones!
In this video , Molly and Martha demonstrate how to create a design that has lots of different places to add colored dots that accent and enhance a simple basic design.
I have a Bijou Index. It is in a large ring binder, filled with clear pages that have pockets that can hold a Bijou tile.
The pages are in sections, with each section covering a specific topic. The sections include one that has a bijou-sized tile for each tangle that I know, one for strings, with each string on it’s own bijou. One section is devoted to color combinations and another is for techniques.
Ribbon tangles! And ‘Nzeppel as a ribbon, continuing an ongoing theme.
This style of tangle can be used as a frame or border. They can appear between other tangles to separate them from each other, or used as an accent to fill in behind focal points.
Sometimes, you might see them in the bands of Hollibaugh.
There are Ribbon tangles that everyone is familiar with, like Archer, Worms or Dragonair. You can also use a single row of a grid tangle. Or you can choose your own adventure, adding a botanical or other style of tangle and placing it in a ribbon, as I did with Pokeroot and ‘Nzeppel here!

Project Pack 22 - Day 3 - Phi Spiral
In this video , Julie demonstrates how to use Hollibaugh to create a Reticula along a spiral shape, which she then fills with ‘Nzeppel bubbles.
The remaining spiral shapes are filled with a traditional Marasu rendition which povides a old contrast to the Hollibaugh-‘Nzeppel design.
This was not a difficult lesson to follow along with. It was fun and relaxing to do.
I am still having fun with variations of ‘Nzeppel, crazy or not!
Since I was given the tangle Drawings in my random selection, I decided to make it the large focal point of my tile today.
Then I used Crazy ‘Nzeppel as my background fill. I used a lighter color, gray Micron pen to draw it, so it would recede more into the background. I also wanted an opportuntity to use a specific style of shading for it. I think this style emphasizes the “bubble” more and the background less.
This was created by using Crazy ‘Nzepple as a reticula in a spiral grid. Then the fragment K7, a Crescent Moon in a grid shape, was added to each section of the grid.
I wanted to use contrasting and complimentary colors for this design, so I chose Micron pens in colors reminiscent of the Pacific Northwest indiginous cultures.
Strong corner rounding was used within each section of the grid after the ‘Nzepple bubbles were drawn to make each section stand out.
While I was at it…
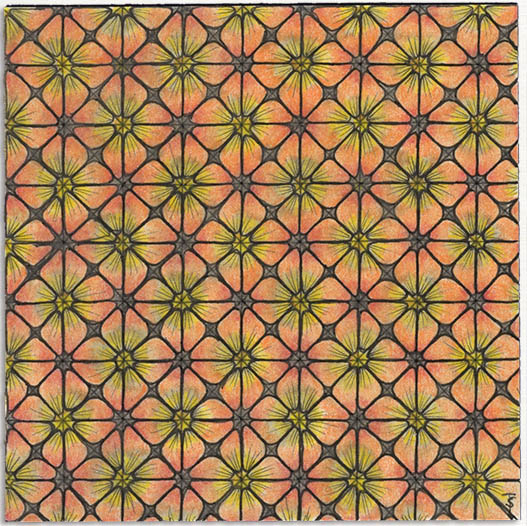
This is a very traditional rendition of Nzepple drawn in a standard grid. What makes it look different is the coloring and where the lines on the petal shapes are drawn!
Since I’ve been tangling with various versions of Nzeppel, it just made sense to add an original version.
The overall tile makes me think of Japanese Origami paper.
Zentangle drawn on Strathmore Vellum Bristol using a black, Micron pen. Coloring and shading done with Crayola blending pencils.

Randomly selected tangles applied to a simple criss-cross string.
If I draw a ribbon-type tangle, I will often use it along the string to define individual spaces. This accounts for the center, angular location of the Hibred tangle.
Then I arrange the other tangles so they balance out the best possible taking drama, complexity and type into consideration.
It all usually works out fine, which is one of the wonderful things about tangling!

Another tile using ‘Nzeppel as a reticula. This time, Bunzo was tangled inside of each “bubble”.
Shadinging was done around the edge of each bubble, on the Xs inbetween bubbles, and where the Bunzo shapes overlapped another.
This was a bit tedious, but if you go slowly and don’t put too much pressure on the pen, it works!
Zentangle drawn on a black, standard Zentangle tile using a white Sakura Gelly Roll pen. Shading done with graphite pencil.

Project Pack 22 - Day 2 - 5 Spirals
The video for this lesson is here .
In the second lesson, Molly and Martha show us how to complete a pre-strung, 5xPhive tile. This project uses all the the tools that came in the project pack to decorate 5 spirals arranged in a wreath.
I am starting to get the hang of working over the Moonlight ink with graphite and the white chalk pencil. The main conclusion that I’ve come to is to let that ink get good and dry! Since I live in Arizona, where it is hot enough to bake cookies on your dashboard in the summer… letting the ink sit undisturbed over night did the trick. Shading and highlighting was more succesful this time!
Continuing along the Crazy ‘Nzepple trail…
This time I used a grey tile. I loved the Project Pack that I did with the grey tiles previously and wanted to do something with this “winter” theme… since today, it was over 113 degrees here!
Instead of doing the same thing in each bubble, I chose several tangles and did each one in four or more sections, aiming for them not to touch each other if possible.

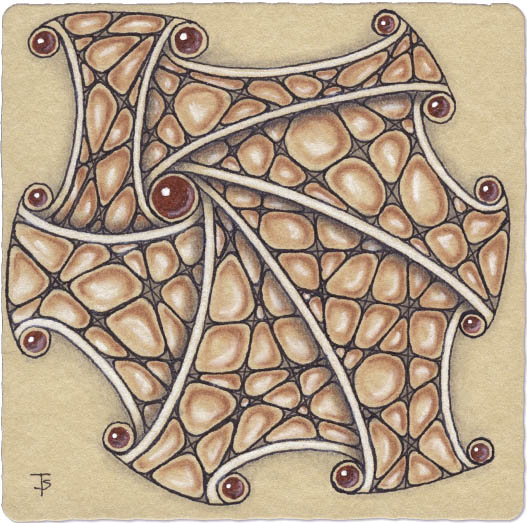
I don’t think I have ever done ‘Nzepple on a tan Renaissance tile!
Inspired by what I tried on yesterday’s tile, I decided to give it another go, using somewhat different materials and some style changes.
After drawing a curvy grid with dark brown, I used the same pen to round the corners of each section. This gave me the rounded baloon shapes without drawing them in each section.