
If you are in the Phoenix metro area, you can take Zentangle classes from me! If you are anywhere in the world, you can STILL take classes from me! (See the bottom of this post!)
Thursday, August 16, 10:30 am to 12:30 pm Thursday, August 23, 10:30 am to 12:30 pm Beginners 1: Introduction to Zentangle Class Zentangle is a simple-to-learn, relaxing, meditative way to create beautiful art by drawing structured patterns, one stroke at a time. Unlike other art forms, there are no mistakes in Zentangle. You do not have to have any art, drawing or tangling experience to succeed in this class. If you can print the letters i-c-s-o, you can tangle.

Sneak peak!
It is that time of year when we start thinking about the upcoming holidays. I know that the beginning of August seems like it’s way to early… But it depends on who you are.
If you are a CZT, we are all busy planning the fall classes for you! One of them that I have in mind is one in which my students will be making Holiday hanging ornaments.

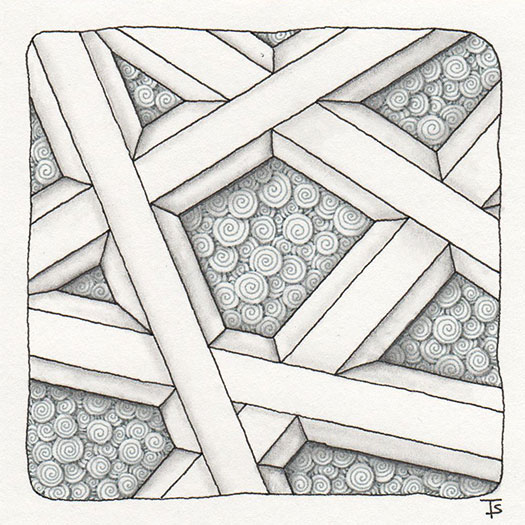
Hydroponics.
It had been months since she had taken the ship out on a mission. But it was time. Everything in the ydroponics bay was ready. And she knew the eggs would hatch right after her arrival.
The Zed’s wanted them all newborn before they would accept delivery.
Zentangle drawn on Strathmore Vellum Bristol using a black, Micron pen. Shading done with graphite pencil.
Tangles: Caviar Centipede Crazy N'Zeppel Deco Border Glukes Tidings Toodles

Inchies.
Remember last week when I showed you my desk scattered with some old art pieces? Well, here’s what I did with some of them!
I created an inchie mosaic following Eni’s instructions in her Inchies Mosaic Video Lesson . Inchies are little, 1-inch squares of art.
This is my first mosaic, following the instructions in the lesson. I got my tiles cut a bit wonky, which is totally my fault. I used a small paper cutter instead of following the instructions in the lesson. My bad! It caused my tile sizes to be inconsistent, which caused the entire grid to be off. That’s why my borders are an inconsistent size.

Amanda created this tile with the help of her family! She has four children that range in age from 7 to 17 years old.
She started by creating the string and then, each child would roll a dice and select a random tangle. The child would also choose where the tangle would go in the string.
The kids got a big kick out of challenging Mom, and they had a ton of fun. In addition, the final Zentangle came out great!

What do you do with all your leftover small pieces of paper with art of some kind on them? Look at this new lesson from Eni Oken’s art club! Doesn’t this look like fun?
Stay tuned for more updates!
Distress ink, acrylic ink, watercolor on Strathmore Bristol Vellum.
Tangles: Ennies Magma Meer Nekton

Folk art.
A few years ago, I was looking at various examples of American Folk Art. One of the things I liked about it was the bright colors and how the simple designs combined to create a more complicated finished product.
Here, I decided to use simple auras, perfs and tangles to create a more folk-art like tile. I like the simplicity of this design. Actually, if you look at the Zentangle Gallery , I’ve used it on another tile, (in a slightly different form,) recently!
Overhead.
We spend so much time looking down. I wonder how much we miss by not looking up once in a while? What is the ceiling like in the Cathedral or Museum? How about that old building on the corner? What does it look like above the trees at night? Or the clouds in the sky before or after a storm?
Zentangle drawn on Strathmore Vellum Bristol using a black, Pigma Micron pen and a cool grey Copic Multiliner. Shading done with graphite pencil.

Amanda sent me this picture of a Zenbutton that she created recently. It’s a wonderful collection of fragments done in vibrant purple!
I love the combination of fragments that she used here. They create a lot of design movement and variation.
Zentangle drawn on an Official Zentangle tile using a pink and purple, Micron pens. Shading done with colored pencil.
Tangles: Fragment F2 Fragment G22 Fragment H15 Fragment V2

If you recall, a while back I posted a couple of Bijou tiles with Muchin shaded in different ways. I thought that it would be fun to post the same thing, but this time, showing the shading and highlighting on a black tile!
Zentangle drawn on a black, Official Zentangle Bijou tile using a white, Sakura Gelly Roll pen. Highlighting done with white chalk pencil. Shading done with Copic markers and black colored pencil.

Waltz.
1.. 2.. 3… 1.. 2.. 3… And a twirl around here and there. When I look at this tile, that ballroom dance, learned so long ago comes to mind.
I like the counterpoint of the graceful Mooka dancing around the edges of the triangular, jeweled Tripoli. I loved creating this tile. It’s simple design allowed me to practice precise, balanced line placement. I find that very Zen.
Zentangle drawn on Strathmore Vellum Bristol using a black, Micron pen. Shading done with graphite pencil.

It’s hot. I mean really, really hot. Yesterday on the way home, it was 118˚. On Monday, it was 119˚! The official temperature (in the shade at the airport!) was a few degrees cooler. But I don’t live in the shade at the airport. I try to stay home, but once in a while, I just have to go out. Those higher temperatures were reported by my car’s thermometer.

All dressed up.
This little bijou is a remake of one I did at the CZT seminar. I decided to dress it up a bit by mounting it on a tan tile and adding a few frames. Huggins has become one of my favorite, meditative tangles!
Zentangle drawn on an Official Zentangle Bijou tile using a black and brown, Pigma Micron pens and white, Sakura Gelly Roll. Shading done with graphite pencil and Copic markers.

Tangleation.
Sometimes you just need a small change to create an interesting difference.
A Tangleation is a noticeable variation of an existing pattern. Here, the original tangle was Bales. In this version, it appears as if one rice shape is piercing the other where they cross.
Sometimes you just need to tangle a small thing and then move on with your day.
This is a Bijou tile, and there is just one tangle on it. Perhaps you are busy, and don’t think you have time to tangle. You don’t have to make a large tile with a complicated piece of art! You can make a small, simple wonder on a Bijou! They’re only 2-inches square, and still add a little Zen to you day!

No mistakes.
That’s right… There are no mistakes in Zentangle. Unexpected things DO happen, but they aren’t mistakes. They are opportunities to explore another direction. You don’t give up. You don’t throw away the work you’ve already done. Following a different fork in the road can take you to new vistas and allows you to discover new techniques. Some of the best tiles I’ve made come from unexpected twists and turns during the process. Here are some links to tiles that went off in directions that were unplanned.

This is another tile that I, unfortunately, left at Seminar. But I have to say that I actually like this version better! I normally put finished tiles in my scrapbook on a black background. But here, I decided to change it up a bit because I made the edge of the 3Z black. With it on a taupe background, I think it stands out better.
Zentangle drawn on an Official Zentangle 3Z tile using a black, sepia and brown, Pigma Micron pens and white Sakura Gelly Roll pen. Shading done with graphite pencil and Copic marker.

Monday, July 16, 2018 I taught the first and second Introduction to Zentangle classes at Good Gifts Healing Art Studio .
We had eight eager students in the first session. You can see their tiles above, before we did any shading on them.
The second session was smaller and more personalized, with two wonderful, attentive students. Below, I’ve added my tile to the mosaic to make it more impactful.
I had so much fun with everyone! It was really interesting to listen to each student’s story and find out what brought them to Zentangle and what they plan to do with.

I accidentally left 3 tiles behind at the CZT Seminar. While I’m sad about that… I decided to recreate them! This one is done on a Zendala tile, but it’s not perfectly symmetrical. Working in the round isn’t something that I do very often. But I was very surprised at how relaxing this was. I think not having to make everything match from side to side takes the stress out of this type of design.

River of berries.
Adding a bit of graphite, using a simple pencil and a tortillon, transforms tangles on a tile into a small piece of art and fills it with life. Don’t fear the pencil!
Zentangle drawn on an Official Zentangle tile using a black, Micron pen. Shading done with graphite pencil.
Tangles: Fife Flukes Poke Root

This beautiful Spundala was created by CZT Amanda Higbee! I am blown away that she used Pea-nuckle in the round. I don’t think that I’ve ever seen anyone do that before! It certainly never occurred to me to try it!
Zentangle drawn on Strathmore Vellum Bristol using a purple and pink, Sakura Pigma Micron pens. Shading done with watercolor pencils.
Tangles: Crescent Moon Emingle Keeko Pea-Nuckle